Get started
From a blank ESP32-WROVER to your first live measurement. You flash the firmware once over USB; after that the hub updates itself over the air from the web app.
-
Flash the firmware
A blank hub needs the full image set, which isn't in the GitHub release yet — build it from source (ESP-IDF v5.4.1) and flash over USB. The release'smain_release.binis an over-the-air update image only; it won't flash a blank hub on its own. -
First boot & Wi-Fi
On first boot the hub starts its own Wi-Fi network,rbgrid-<id>. Connect to it, open192.168.4.1, choose your home Wi-Fi and set your access-point password. -
Open the app from your hub
The web app is served by the hub itself, at its address on your network — not from this site. Open it in any browser on the same network. -
Your first measurement
In the app, add a measurement point and bind it to your rbAmp module. Live readings appear at once; statistics and history build up over time.Install with the power off, and have mains work done by a qualified electrician. The rbAmp modules clip onto existing wiring. rbAmp safety notes
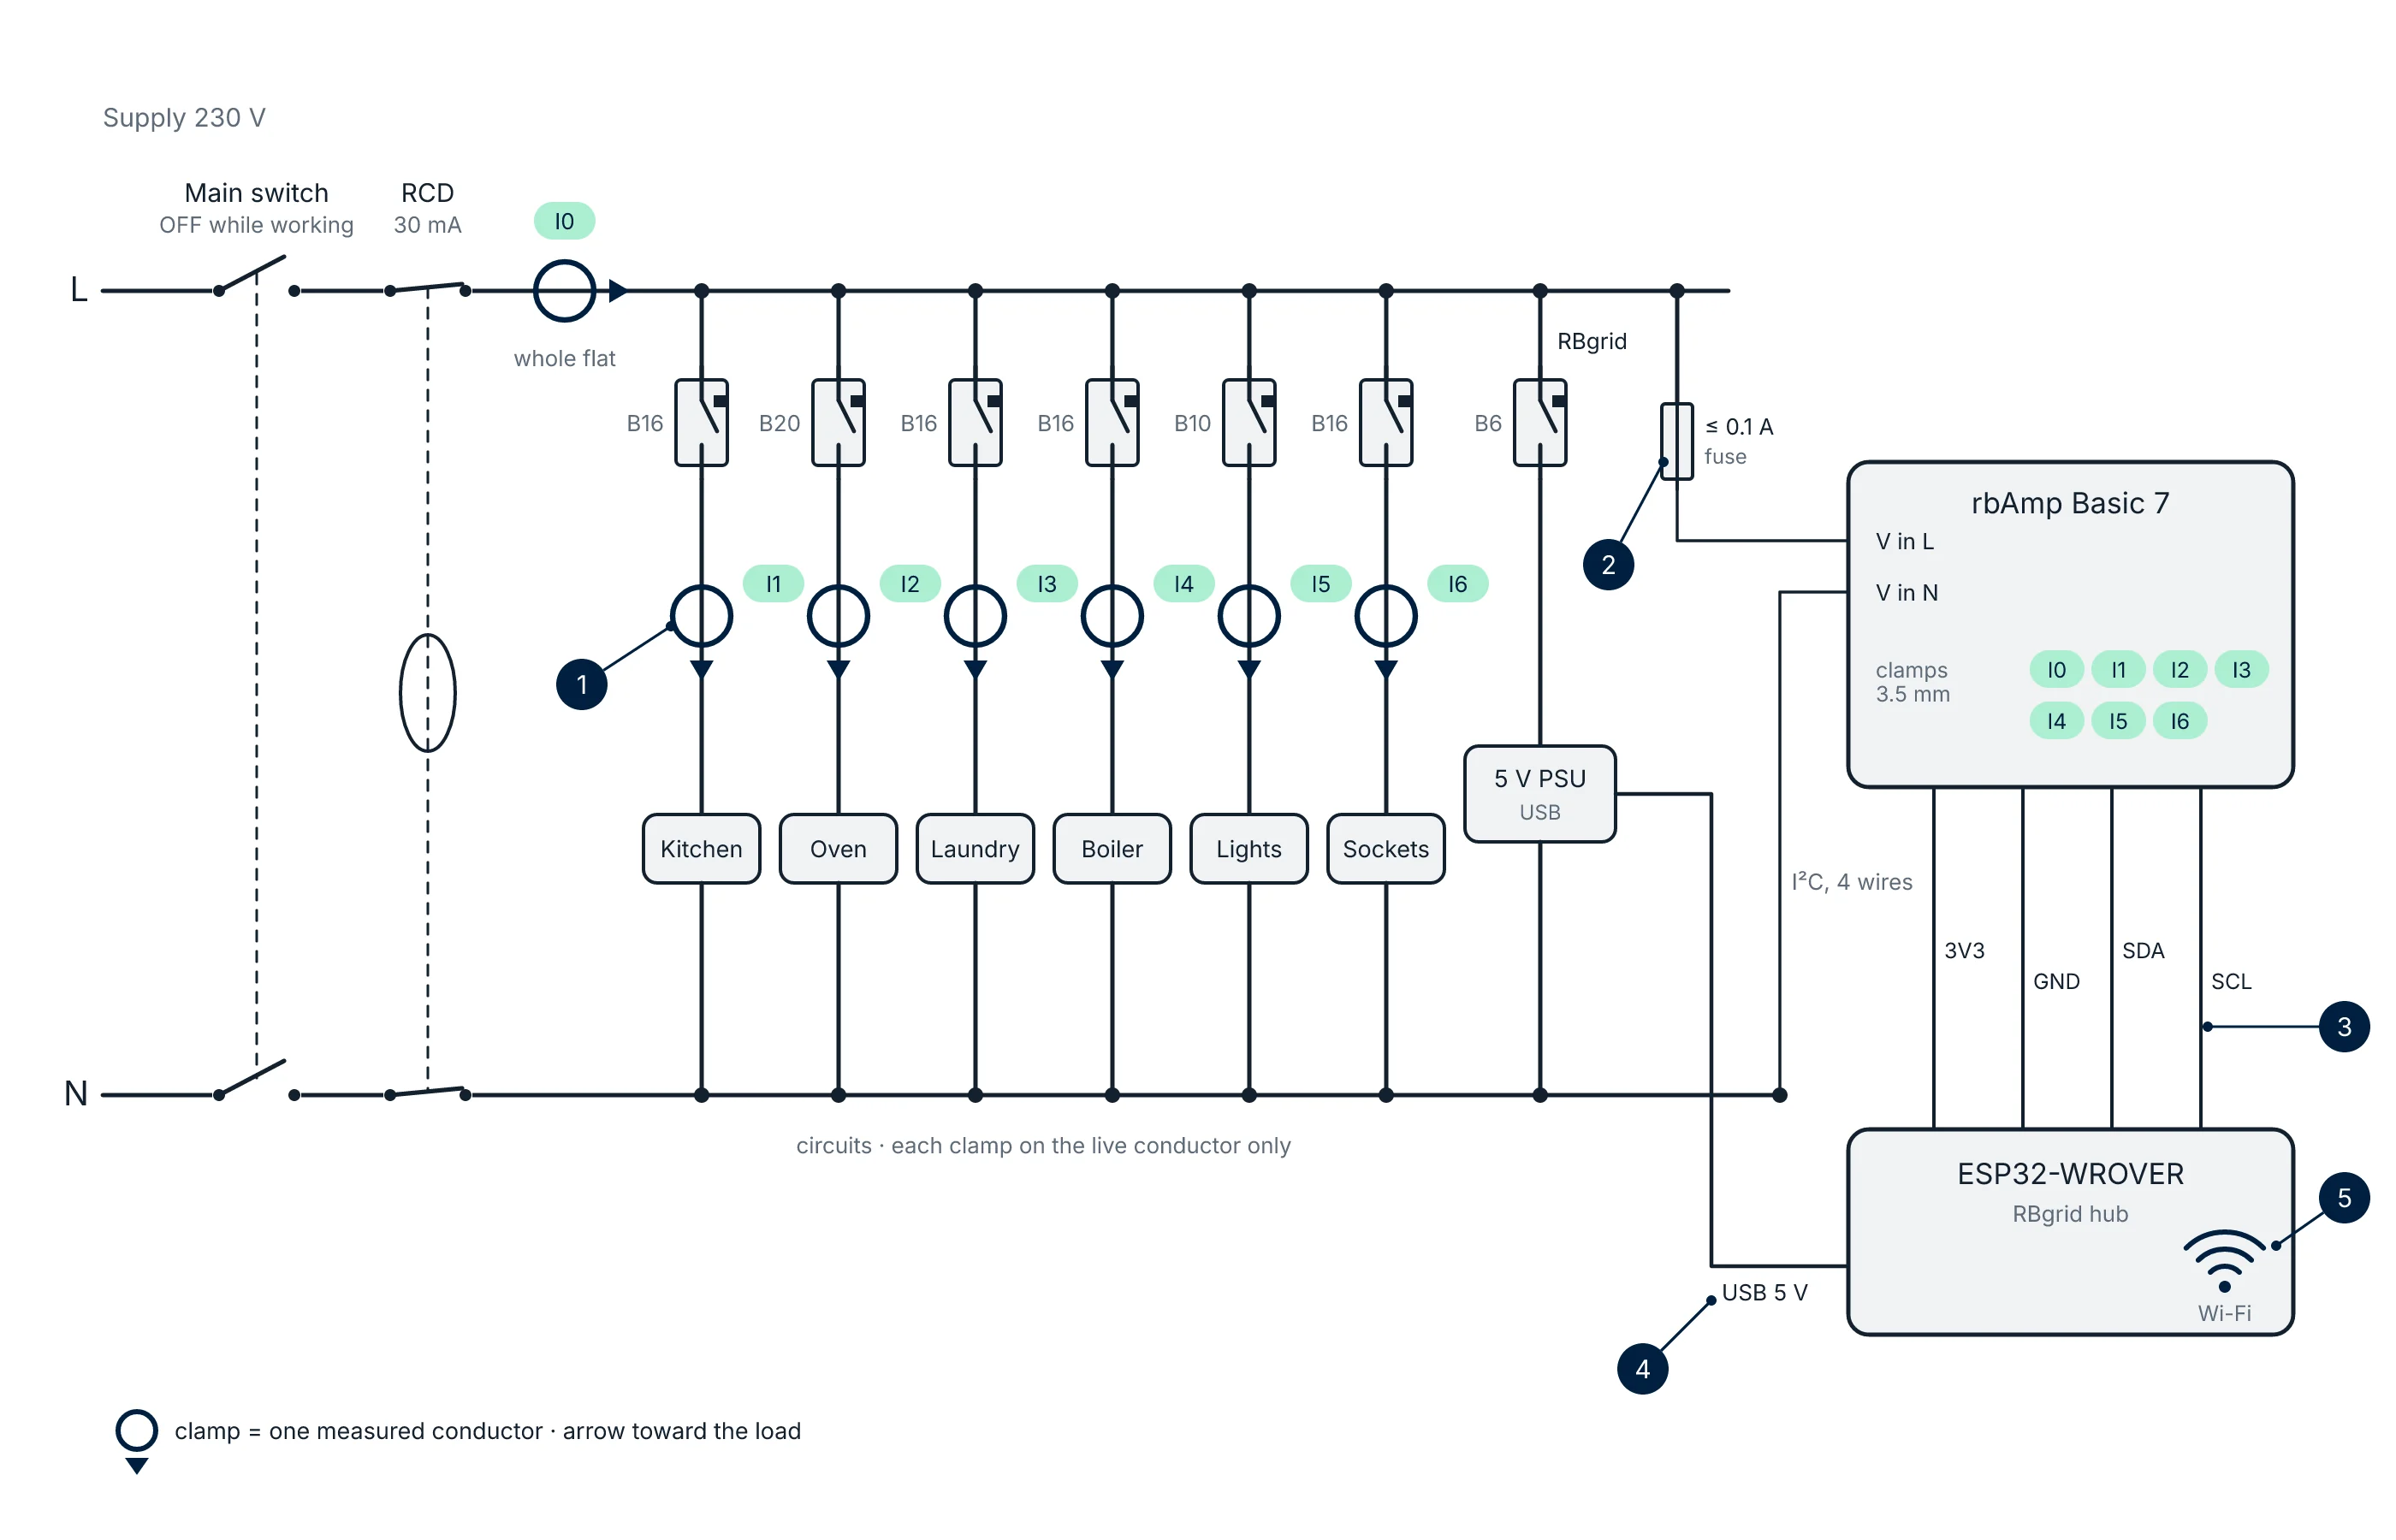
- Clamp around the live conductor only, arrow toward the load
- Voltage reference through a fuse
- Module to board: four wires (I²C)
- Board powered from USB
- Wi-Fi to your home network.