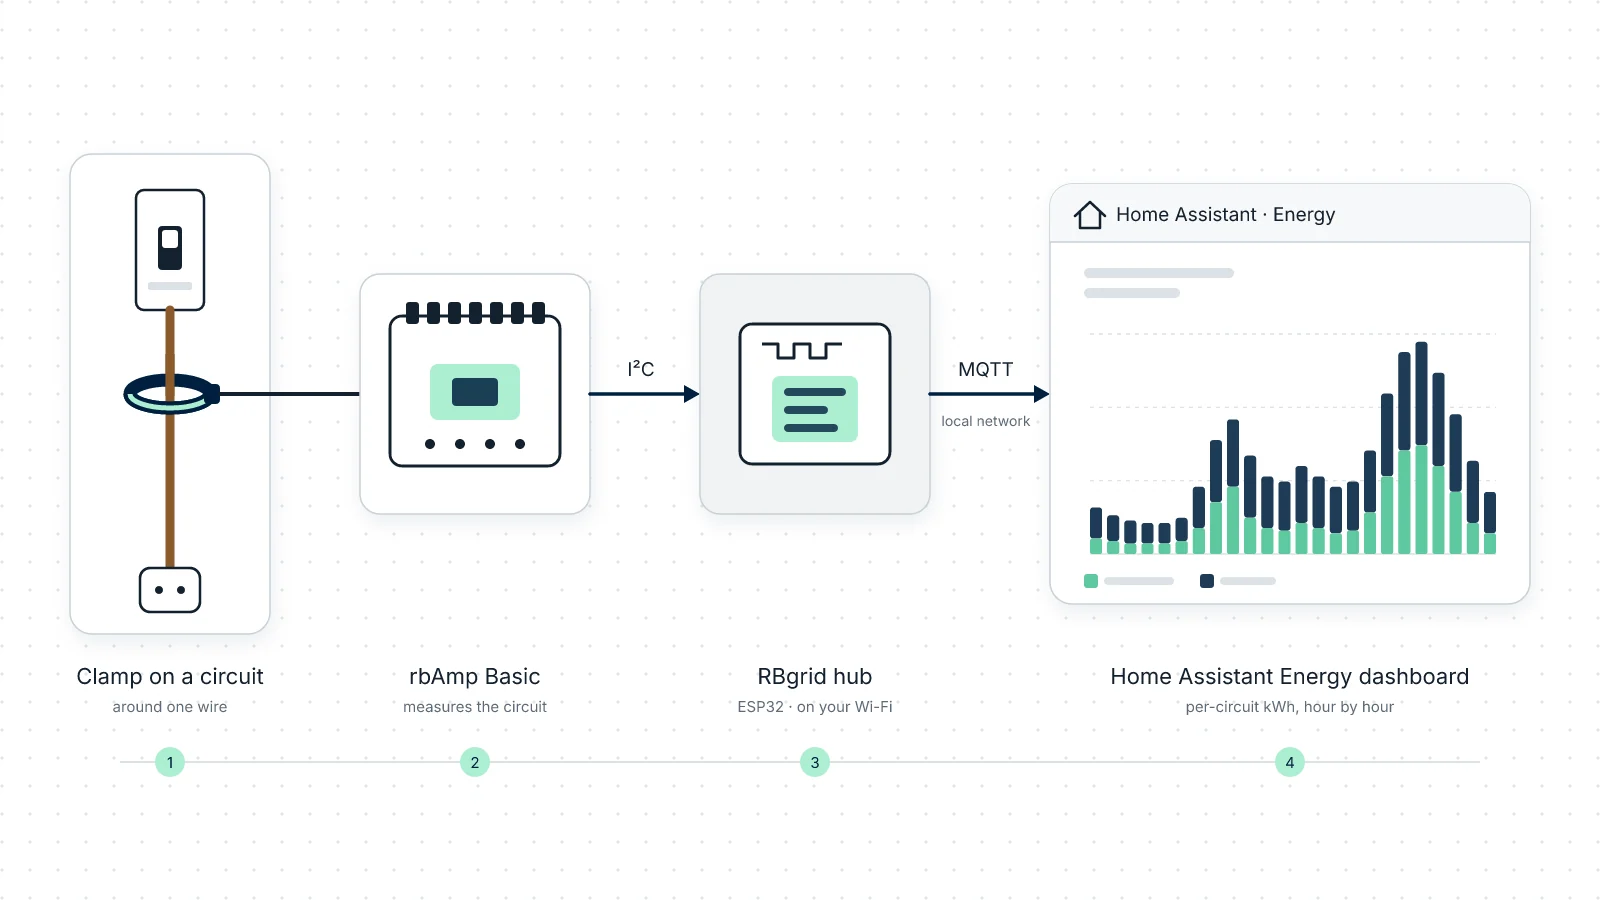
Home Assistant's Energy dashboard wants energy sensors that only ever count up. With a plain power reading, that usually means a utility_meter helper or a template. RBgrid keeps the lifetime and daily energy counters on the hub itself, and Home Assistant gets them as finished sensors over MQTT discovery: you pick them in the Energy dashboard.
Short version: flash the hub (the module becomes your Main point) → point the hub at your MQTT broker and restart it → in Settings → Dashboards → Energy, pick the point's lifetime Energy In. Already have a broker? Skip to step 3.
A point is one named measurement, such as "Kitchen", tied to one clamp on one module channel. The hub is the ESP32 board running RBgrid. You use the RBgrid app only to set the hub up (or its REST API, if you prefer); after that, Home Assistant is where you read the data.
What you need: an ESP32-WROVER board with PSRAM and 16 MB flash, one rbAmp Basic module for SCT-013 (one voltage input plus one to seven current channels, depending on the model), one voltage-output SCT-013 clamp, and a Home Assistant with an MQTT broker. Modules from $3.99, see rbamp.com.
Safety. For any work inside an electrical panel, call a qualified electrician. See the rbAmp safety notes.
Clamp one conductor only (L), never the whole cable: the currents in L and N cancel out.
1. Flash the hub and measure one circuit
Use a Basic module with a voltage input (the UI models): it measures voltage itself, so the hub can work out power and energy. A current-only module on its own can't.
- Wire the module to the hub and fit the clamp around the circuit's live conductor, as in Get started. Leave the module at its factory address 0x50.
- Flash the hub with the four release files and join it to your Wi-Fi through its own network
rbgrid-xxxxat192.168.4.1. → Quick start - Open the app, at webapp.rbgrid.io or installed on the hub.
- Open Points. A new hub has already made the module's first channel your Main point, plus a voltage point: there's nothing to bind for it.
- Check the clamp model (Current sensor in the point's settings) and set it to the clamp actually on the wire, so the readings use the right scale.
- Clamps on the module's other channels? Bind them as extra points, with names you'll recognise, such as "Kitchen". Home Assistant uses the names for its devices.
- Restart the hub once (Settings → Administration) so new points start keeping history.
Your clamp must be a voltage-output SCT-013 (1 V at rated current: −005, −010, −020, −030, −050, −060 or −100). The current-output SCT-013-000 isn't supported. Not sure which one you have? See Which SCT-013 do you have?
You'll know it works when the point shows live power that rises within a few seconds of switching on a known load, such as a kettle. Home Assistant can only show what the hub measures.
2. Have an MQTT broker in Home Assistant
The hub needs a broker address, a port, a user name and a password. If you don't run a broker yet, the usual path on Home Assistant OS is the Mosquitto broker add-on plus the MQTT integration:
- Settings → Add-ons → Add-on store → Mosquitto broker → Install, then Start.
- Settings → Devices & services: Home Assistant finds the broker by itself. Choose Configure and Submit (or Add integration → MQTT).
- Create a user for the hub: Settings → People → Users → Add user. The Users tab shows only with Advanced mode on in your profile. The Mosquitto add-on checks MQTT clients against Home Assistant users.
On Home Assistant Container or Core there are no add-ons: run any MQTT broker (for example the eclipse-mosquitto Docker image), create the user with mosquitto_passwd, then add the MQTT integration by hand: Settings → Devices & services → Add integration → MQTT, with the broker's address, port 1883, user name and password.
You'll need the broker's address, port, user name and password in the next step.
3. Point the hub at the broker
In the RBgrid app, open Settings → Home Assistant. Until you enter a broker, MQTT is off and the panel says so.
In the MQTT broker form, fill in:
- Broker address: the IP or host name of your broker (with the Mosquitto add-on, that's your Home Assistant machine's address)
- Port: 1883
- Login and Password: the user you created
Save, then press Restart now: the hub connects to the new broker after a restart.
There's no discovery switch to find: the hub always publishes Home Assistant discovery when it's connected to a broker. It also picks its own client ID.
The connection to the broker isn't encrypted, so keep the broker on your local network, with its own users. Everything about topics, the command channel and broker security is in MQTT broker.
4. What appears in Home Assistant
After the restart, Home Assistant adds the hub's devices by itself. Search for RBGrid in the device list or in any entity picker.
| Device | What's in it |
|---|---|
| RBGrid System | Net Power, Frequency, and a few more sensors this guide doesn't use |
| RBGrid Voltage Bus | Bus Voltage |
| RBGrid Main | the input point (always named "Main") |
| RBGrid + your point's name (for example RBGrid Kitchen) | that point's readings |
Each point device has Current, Power, Reactive Power and Power Factor, plus Energy In and Energy Out. Both energy sensors are lifetime counters in Wh (device_class: energy, state_class: total_increasing). Their (Day) versions restart at local midnight. A point without a name shows up with its four-character ID instead.
How often they update: power, current and voltage every 3 seconds. On modules that count energy on the module itself, the energy counters move once per 15-minute quarter, so a flat Energy In for a few minutes is normal.
If the broker or Wi-Fi drops: the hub keeps measuring and keeps its history; live values aren't buffered or replayed. Home Assistant marks the sensors unavailable about 30 seconds after the hub stops sending. When the hub reconnects, the lifetime counters carry the energy of the whole outage, so the totals have no gap; Home Assistant puts that energy into the hour the data resumed.
Renaming a point changes its device name in Home Assistant, not its entity IDs: those come from the point's fixed ID.
If nothing appears: check the broker address, user and password in the hub, check that you pressed Restart now, and check that the MQTT integration is set up in Home Assistant. The hub's MQTT status topic (rbgrid/<mac>/status) reads online while it's connected. → MQTT broker
5. Add them to the Energy dashboard
In Home Assistant, open Settings → Dashboards → Energy and pick the lifetime counters, not the (Day) ones:
| In the Energy dashboard | Pick |
|---|---|
| Grid consumption | your supply meter's Energy In (see below) |
| Return to grid | your supply meter's Energy Out |
| Individual devices | each circuit point's Energy In, including Main in this guide's one-module setup |
These are energy counters that only go up, in Wh, so the Energy dashboard accepts them directly and converts the unit itself: no utility_meter, no template.
The first bar appears within an hour or two: the energy counters move in 15-minute steps, and Home Assistant builds its statistics hourly. Power shows live at once.
For the whole supply, use an STD meter (an STD-UI1 for single-phase, an STD-U3I3 for three-phase): a precise energy meter for exact metering of the supply, counting energy on the module itself, in both directions. With an STD at 0x50, it becomes Main and its Energy In and Energy Out go into Grid consumption and Return to grid; add the Basic module for the circuits. → Monitoring a flat: the supply, five circuits and a day/night tariff
One module gives you one to seven clamped circuits, depending on the model; a hub takes up to eight modules. → Sensors and modules
6. Where your tariff fits in
Your tariff, and the cost of each circuit at that tariff, are in the RBgrid app. Setting up your own tariff is the next guide in this series.
What this doesn't do
- There are no per-phase entities: with a three-phase meter, the per-phase readings are in the RBgrid app, and Home Assistant gets the totals. → Scenario: one main meter
- RBgrid measures; it doesn't switch or control anything. If you automate a load in Home Assistant, Home Assistant does the acting.
Next
- See the entities in the demo
- Coming from a
utility_metersetup? The hub appears in Home Assistant as separate MQTT devices, so your existing entities and their statistics stay as they are; you can run both side by side and switch the Energy dashboard over when you're ready. - MQTT broker: topics, discovery and commands: history and summaries can also be read over MQTT commands or the REST API
- Integrations: MQTT and REST
- Which modules?
- Questions → Support