Scenario: one main meter
This is the smallest useful RBgrid system: one hub and one rbAmp STD meter measuring everything your home takes from the grid. It is the best way to start. Every other setup (single circuits, solar, more modules) is this one with more points added.
The short version of this page is the Quick start.
What you get at the end
- What your home imports from the grid right now, in watts and in money per hour, at your own tariff.
- Today, this month to date and the tariff zone in force, on the Overview.
- Hourly, daily and monthly history of the input, with cost, in History.
- Optional: the same data in Home Assistant over MQTT.
Choose the meter
| STD-UI1 | STD-U3I3 | |
|---|---|---|
| Supply | single-phase | three-phase |
| Inputs | 1 voltage, 1 current | 3 voltages, 3 currents |
| In the app | one input point | one input point with the sum and each phase |
Both measure in both directions (import and export), so the input stays right if you add solar later.
What you need
- An ESP32-WROVER board with PSRAM and 16 MB flash: this is the hub.
- The rbAmp STD-UI1 or STD-U3I3 with its current sensors.
- A USB cable and a computer with Python (for
esptool) andcurl. - Your home Wi-Fi name and password. The hub uses 2.4 GHz Wi-Fi only.
- A browser: Chrome, Edge, Firefox or Safari for the app served by the hub.
Safety. The voltage input connects to mains. Switch the supply off before you work, and have the mains connection done by a qualified electrician. The current sensors clamp around the conductor and don't touch it.
Step 1. Wire the meter
- Set the module to I²C. The hub talks to the module over I²C. Set the module's interface switch to I²C before you power it: the module reads the switch only at power-on.
- Fit the current sensors. Clamp each sensor around the supply conductor of its channel, after the utility meter and before the main breaker. The arrow on the sensor points in the import direction (from the grid into the home). On an STD-U3I3, each current sensor must sit on the conductor whose voltage goes to the matching input: sensor 1 on L1, 2 on L2, 3 on L3. The module works out each phase's power from that pair, so a swap gives wrong per-phase power and power factor.
- Connect the voltage input through a fuse: L and N on an STD-UI1; L1, L2, L3 and N on an STD-U3I3.
- Connect the module to the hub with four wires: the module's VIN to the board's 5 V/VIN pin (4.5–5.5 V; not 3.3 V), GND, SDA to GPIO25, SCL to GPIO26. VIN only feeds the module's own regulator; its SDA/SCL work at 3.3 V and connect to the ESP32 directly, with no level shifter. Keep the cable up to 15 cm. Leave the module's pull-up resistors as they are: one module needs them. With four or more modules on one bus, they're cut on all but one module; see Sensors and modules.
The module leaves the factory at I²C address 0x50. Leave it there. On first start, a new hub finds the module at 0x50 and creates two points by itself: the grid input (the module's first channel) and the voltage. If the module answers at another address, no grid input is created, so keep the factory address for this scenario.
More: Hardware and the rbAmp STD wiring guide.
Step 2. Flash the hub
Download the four firmware files from the latest release: bootloader.bin, partition-table.bin, ota_data_initial.bin and main_release.bin. Connect the board over USB and run the esptool command from the release notes. It writes all four files at their addresses. → Build & flash
After flashing, the hub restarts and opens its own Wi-Fi network for setup.
Step 3. Put the hub on your Wi-Fi
- On a phone or computer, join the hub's Wi-Fi network
rbgrid-xxxxwith the setup password from the release notes. It's the same on every hub, so you'll change it in step 6. - Open
http://192.168.4.1. - Choose your home Wi-Fi, enter its password and save. The hub restarts and joins your network.
- Find the hub's new address, one of three ways:
- open
http://rbgrid-xxxx.local/, with the same four characters as the hub's Wi-Fi name (for examplerbgrid-bfac.local). This works on Windows, macOS and iOS, not reliably on Android; - join
rbgrid-xxxxagain and openhttp://192.168.4.1: the page shows the hub's address on your home network and a link to the app; - look in your router's list of devices.
- open
The hub keeps its own access point on as well. You'll set your own password for it in step 6.
Step 4. Open the web app
The web app isn't part of the firmware file. Open it one of two ways (→ Opening the app):
- At webapp.rbgrid.io, nothing to install: on a computer on the same network, open webapp.rbgrid.io in Chrome or Edge, enter the hub's address in Device IP or URL and choose Connect. When the browser asks to allow access to devices on your local network, allow it.
- From the hub: install
rbgrid-ui_<version>.zipfrom the same release once, as described in Opening the app, then openhttp://<hub address>/.
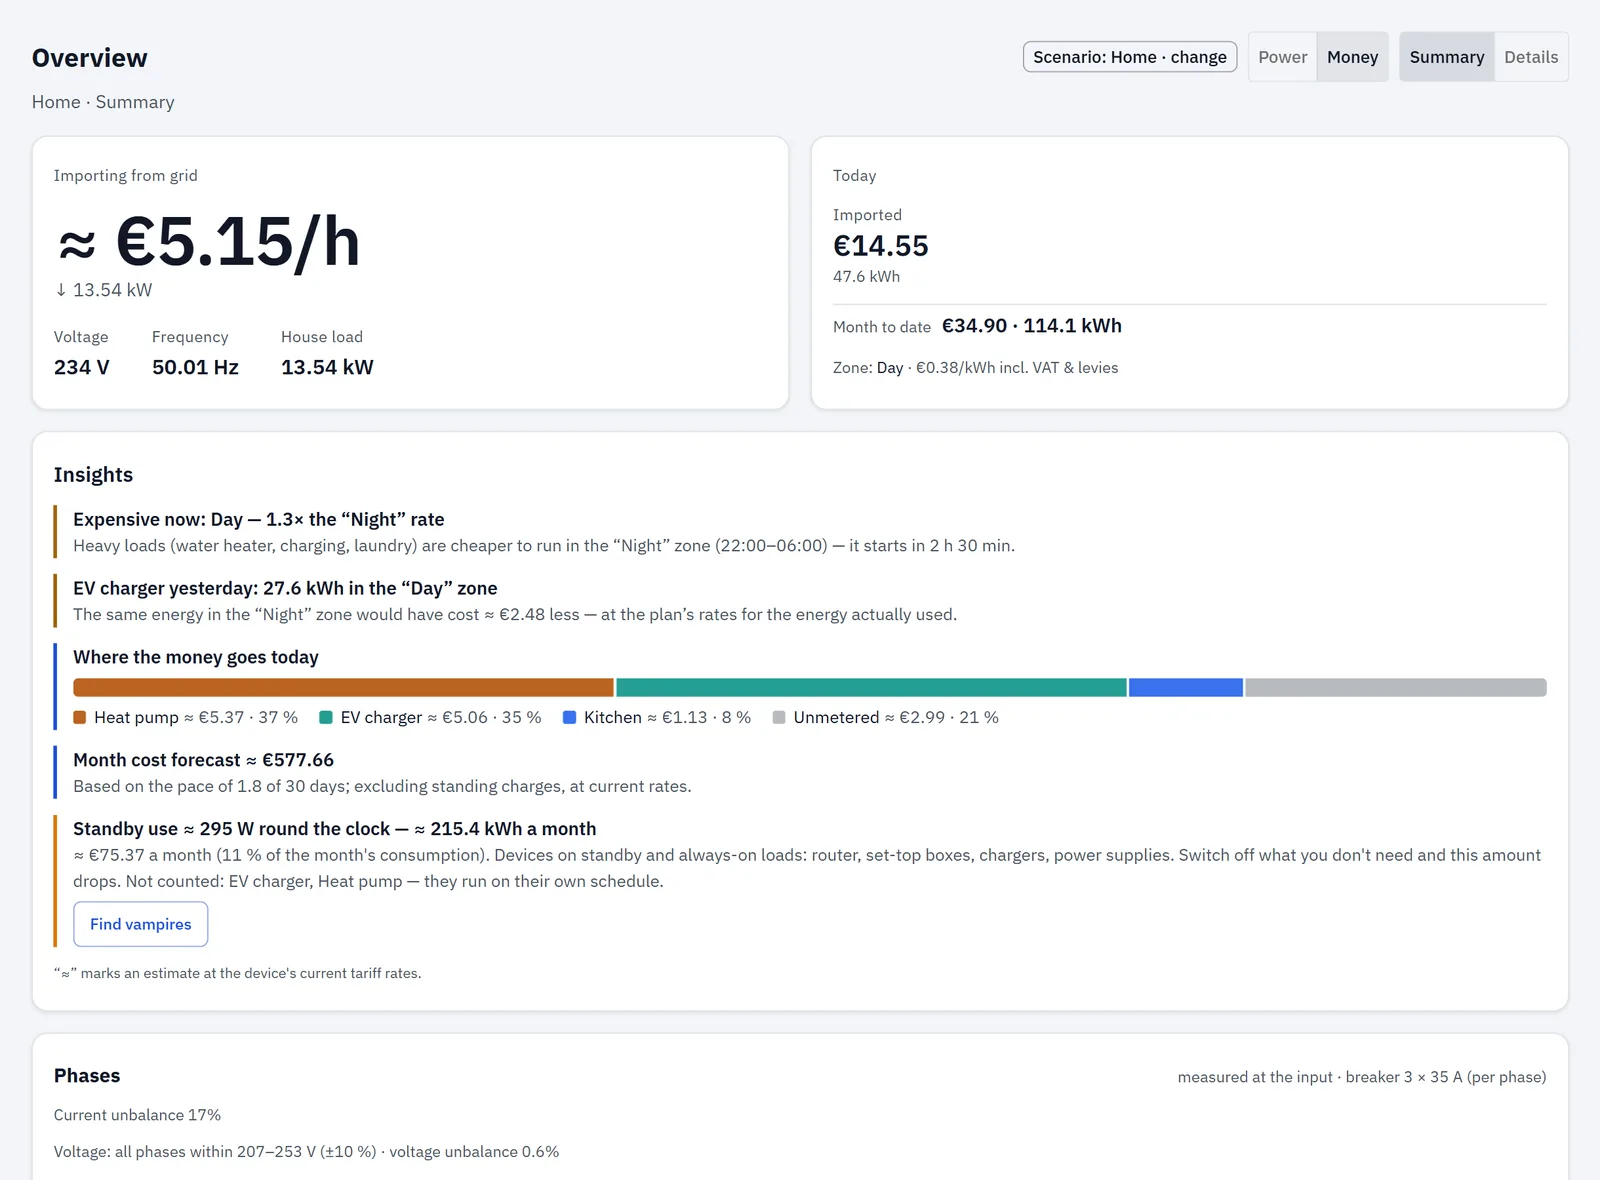
The app opens on the Overview with a banner: The hub still has its factory settings. Choose Set up → to start the wizard. It's also in the menu under System → Setup wizard.
Step 5. The setup wizard
The wizard has seven steps. You can move between them in any order, skip the optional ones and come back later: nothing is blocked. A step that isn't finished shows a note, and Done lists what's left. → Full reference: First setup: the wizard
5.1 Connection
Shows the hub the app is working with. Nothing to fill in.
5.2 Security (optional)
The API token is a password for changing the hub's settings. Without it, anyone on your network who opens the app can change settings or the tariff. Behind a home router that's often acceptable, but we recommend setting one.
Type a token, choose Set and write it down. The app keeps it in this browser. On another browser or device, you'll enter it again the first time you change a setting.
5.3 Site & time
- Site scenario: choose Home. It decides what the Overview shows; you can change it later and nothing restarts.
- Site: give it a Name (for example "My home") and optionally Where it is. Up to 31 characters each. Choose Save.
- Time: choose your Time zone and Save. The zone applies at once.
- Check the status chip: it must read synchronized. The hub sets its clock from the internet (NTP). If it doesn't sync, choose Sync with NTP. On a network without internet, choose Use this device's time: the hub's clock is set from your browser's clock.
Time matters: tariff zones, "today" and "this month" all follow the hub's clock and time zone. → Time
5.4 Sensors
The step lists the module's channels. In this scenario the hub has already created the grid input and the voltage point, so there's nothing to bind, and the step is complete.
The other channels of the module (if any) show as free. Leave them free for now.
STD-U3I3 only: measure all three phases.
- Recommended first: open Settings → Mains and set Mains system to Three phase. This applies at once.
- Open Points. On the module card, choose Use as the three-phase input and confirm.
- Choose Restart now. After the restart, the input measures all three phases: the Overview shows the total, and the input's page shows each phase (voltage, current, power, power factor). The input's history is kept.
This button is on the Points page only, not in the wizard.
5.5 Tariff (optional, but needed for money)
Without a tariff, the hub counts energy but shows money from a factory example. Enter your price as it is on your bill:
- Currency
- Price per kWh. With a day/night tariff, switch on There is a night rate (23:00–07:00) and enter both prices.
- Price as on the bill, incl. VAT: leave it on if the bill price includes VAT, and check the VAT, %. On a new hub it starts at the factory example's 21 %; set your own rate. The hub stores the price without VAT and adds it back.
- The grid pays per exported kWh: only if you have solar and a feed-in contract. Otherwise leave it empty: any price here values every exported kWh.
Choose Save the tariff. With app v1.1.3 the app first asks Replace the hub's tariff?, because the factory example is a fuller plan than the quick form; choose Replace. App v1.1.4 replaces the factory example without asking. Money starts counting at your price from now.
The wizard's tariff always rebuilds the whole plan: other zones, taxes, fees and net metering are reset. Use it on a new hub. To change an existing plan, use Tariffs. → Tariffs
If your night hours aren't 23:00–07:00, or you have more zones, taxes or fees, set the plan in Tariffs instead.
5.6 Integrations (optional)
Home Assistant and other smart-home systems get the hub's data over MQTT. If you don't use them, choose Skip. → MQTT broker
5.7 Done
A summary of the setup:
| Row | Needed for "All set" |
|---|---|
| Site: a name other than "Default" | yes |
| Time zone | no |
| Time: synced | yes |
| Tariff: yours, not the factory example | yes |
| Metering points: at least one | yes |
| Security: token set | no |
When all the required rows are green, the title reads All set. Otherwise it reads Almost done and lists what's left, with a Fix button on each row. Choose Go to overview.
Step 6. Secure the hub's own Wi-Fi
The hub keeps its access point rbgrid-xxxx, still with the setup password. Until you change it, anyone nearby can join it. The Overview and Settings show a warning until you've changed this password and set an API token (without a token the hub doesn't tell the app the password's state).
Open Settings → Hub access point, enter a new password (8–63 characters: Latin letters, digits and symbols) and choose Change password. Devices connected to the access point reconnect. → Settings
Step 7. Check that it works
Open the Overview:
- Now shows the power taken from the grid and what it costs per hour at the current tariff zone.
- Switch on a known load (a kettle, a heater). The power should rise by about its rating within a few seconds.
- If the power shows as export while you're only consuming, a current sensor faces the wrong way: switch the supply off and turn the sensor round on the conductor.
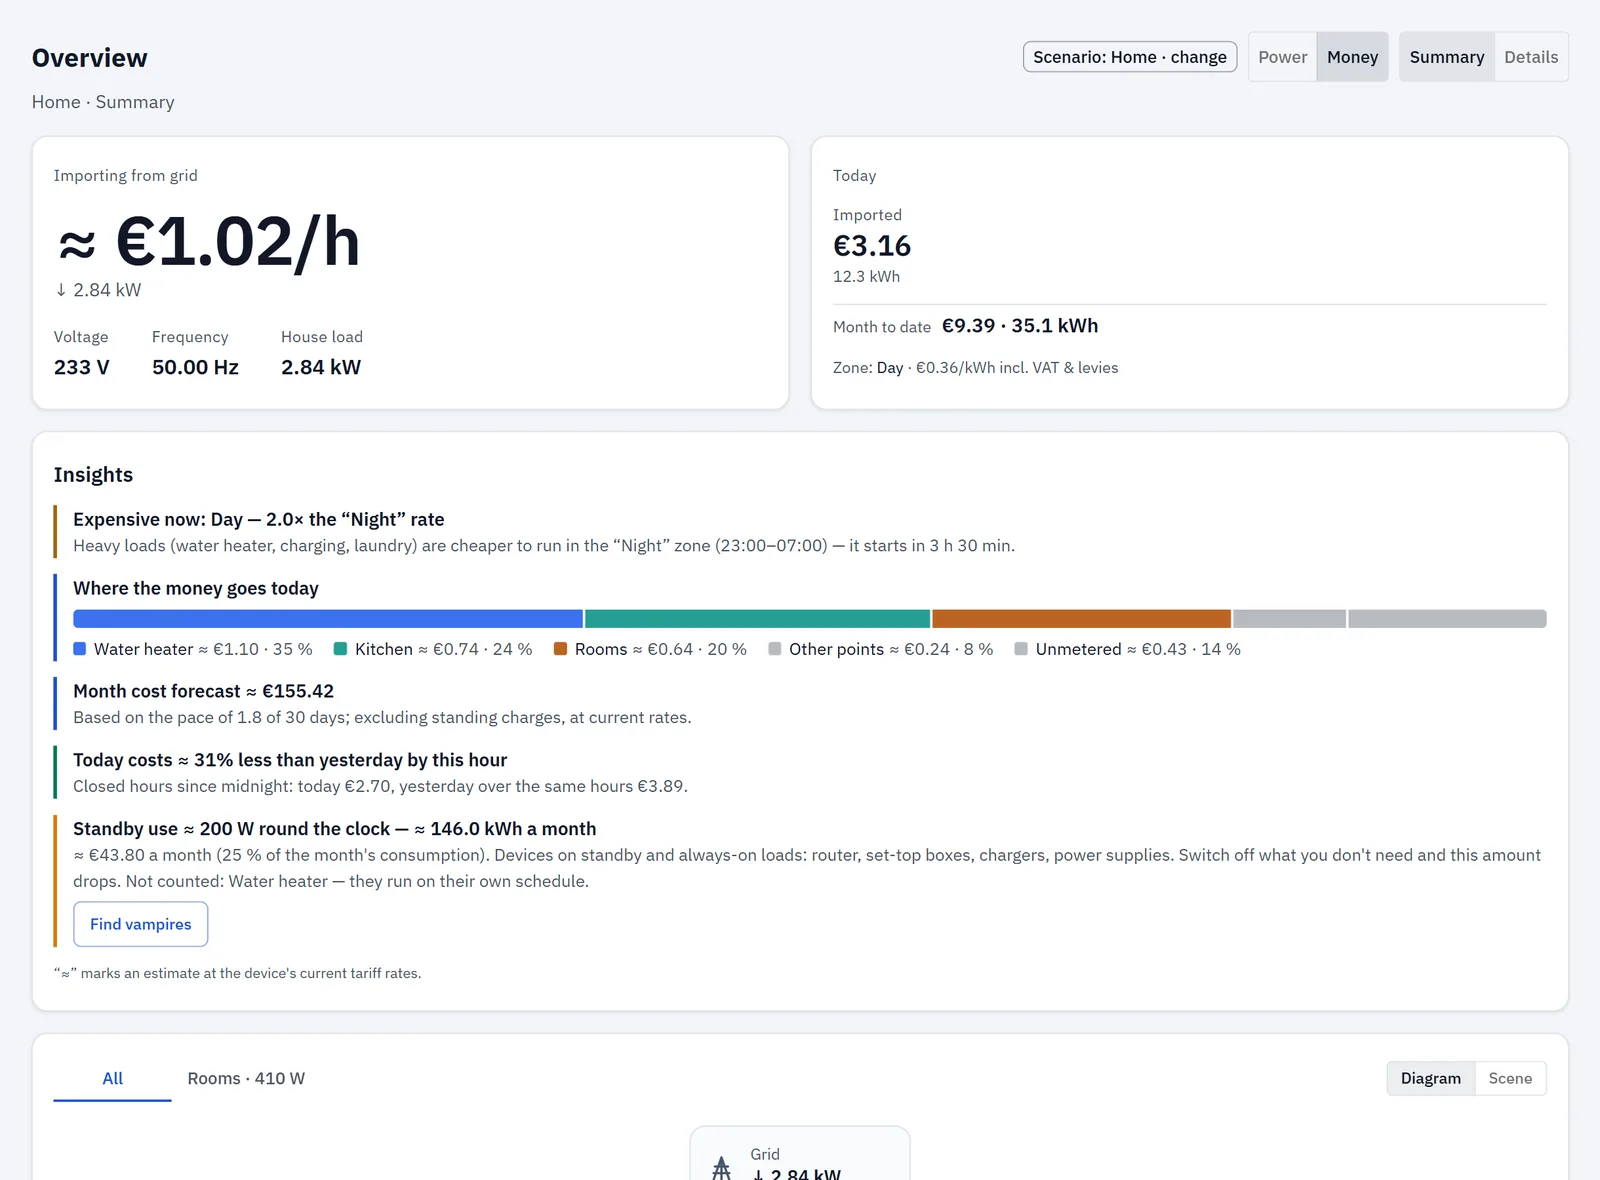
History starts with the first full hour. Daily and monthly views fill in as time passes. → History
What next
- Measure single circuits: add rbAmp Basic or STD modules, one at a time, from Points → Add a module. The hub moves modules off the factory address for you. Up to 8 modules, on hub firmware v1.1.2 and later. → Sensors and modules
- Bind the free channels as points (water heater, kitchen, heat pump). Restart the hub after adding points so they start keeping history. The hub keeps history for up to 12 points; more points show live values only. → Points
- Refine the tariff: more zones, energy tax, grid fee, VAT, a feed-in price. → Tariffs
- Home Assistant: connect a broker. → MQTT broker
- Questions: FAQ