First setup: the wizard
The setup wizard takes a new hub through the settings it needs to start measuring: the site name, the time, the first metering points and a simple tariff. The wizard never opens by itself. On a new hub the Overview shows a banner: "The hub still has its factory settings: … The setup wizard takes a couple of minutes." Press Set up → to start. You can also open the wizard at any time from Setup wizard in the app's System menu.
How the wizard works
The wizard has seven steps:
| # | Step | Can be skipped |
|---|---|---|
| 1 | Connection | no (information only) |
| 2 | Security | yes |
| 3 | Site & time | no |
| 4 | Sensors | no |
| 5 | Tariff | yes |
| 6 | Integrations | yes |
| 7 | Done | — |
- Move with Back and Next. Optional steps also have Skip.
- Nothing is blocked. If a required step isn't finished, the forward button reads Continue instead of Next, and the wizard shows: "This step isn't finished yet. You can finish it now or continue and come back later."
- The step list at the top is clickable, so you can jump to any step. On a phone it shows "Step n of 7" and a progress bar instead.
- A finished step gets a tick. Optional steps get their tick once you've moved past them.
- Each time you open the wizard, it reads the current state from the hub, so finished steps show as finished. The step you were on is remembered in this browser only; another browser starts again at step 1.
Every setting in the wizard can also be changed later in Settings, Points or Tariffs.
1. Connection
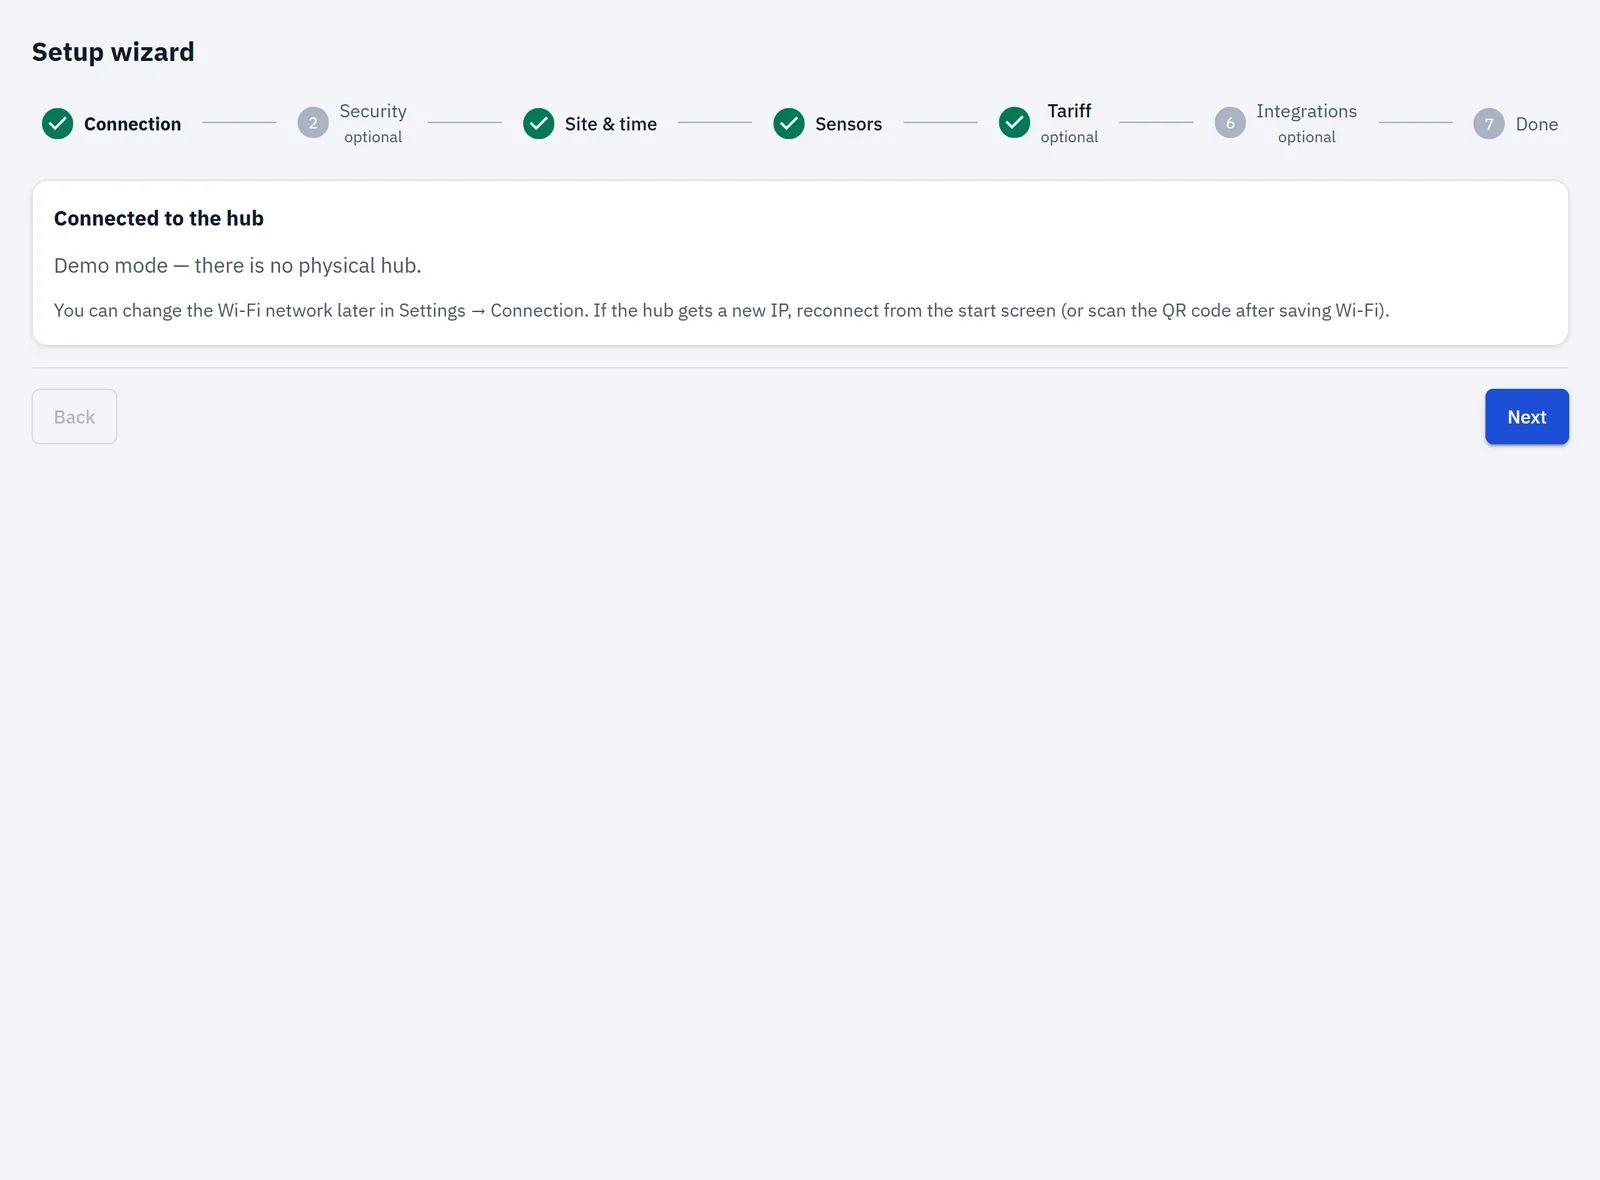
This step only confirms that the app has found the hub: "Connected to the hub. The app is working with the hub at …". When the app is served by the hub itself, the line ends with this device. A hub address appears only when you opened the app at webapp.rbgrid.io or switched to another hub with Switch. There's nothing to fill in.
You can change the hub's Wi-Fi network later in Settings → Connection. If the hub then gets a new IP address, connect to it again from the app's start screen.
2. Security (optional)
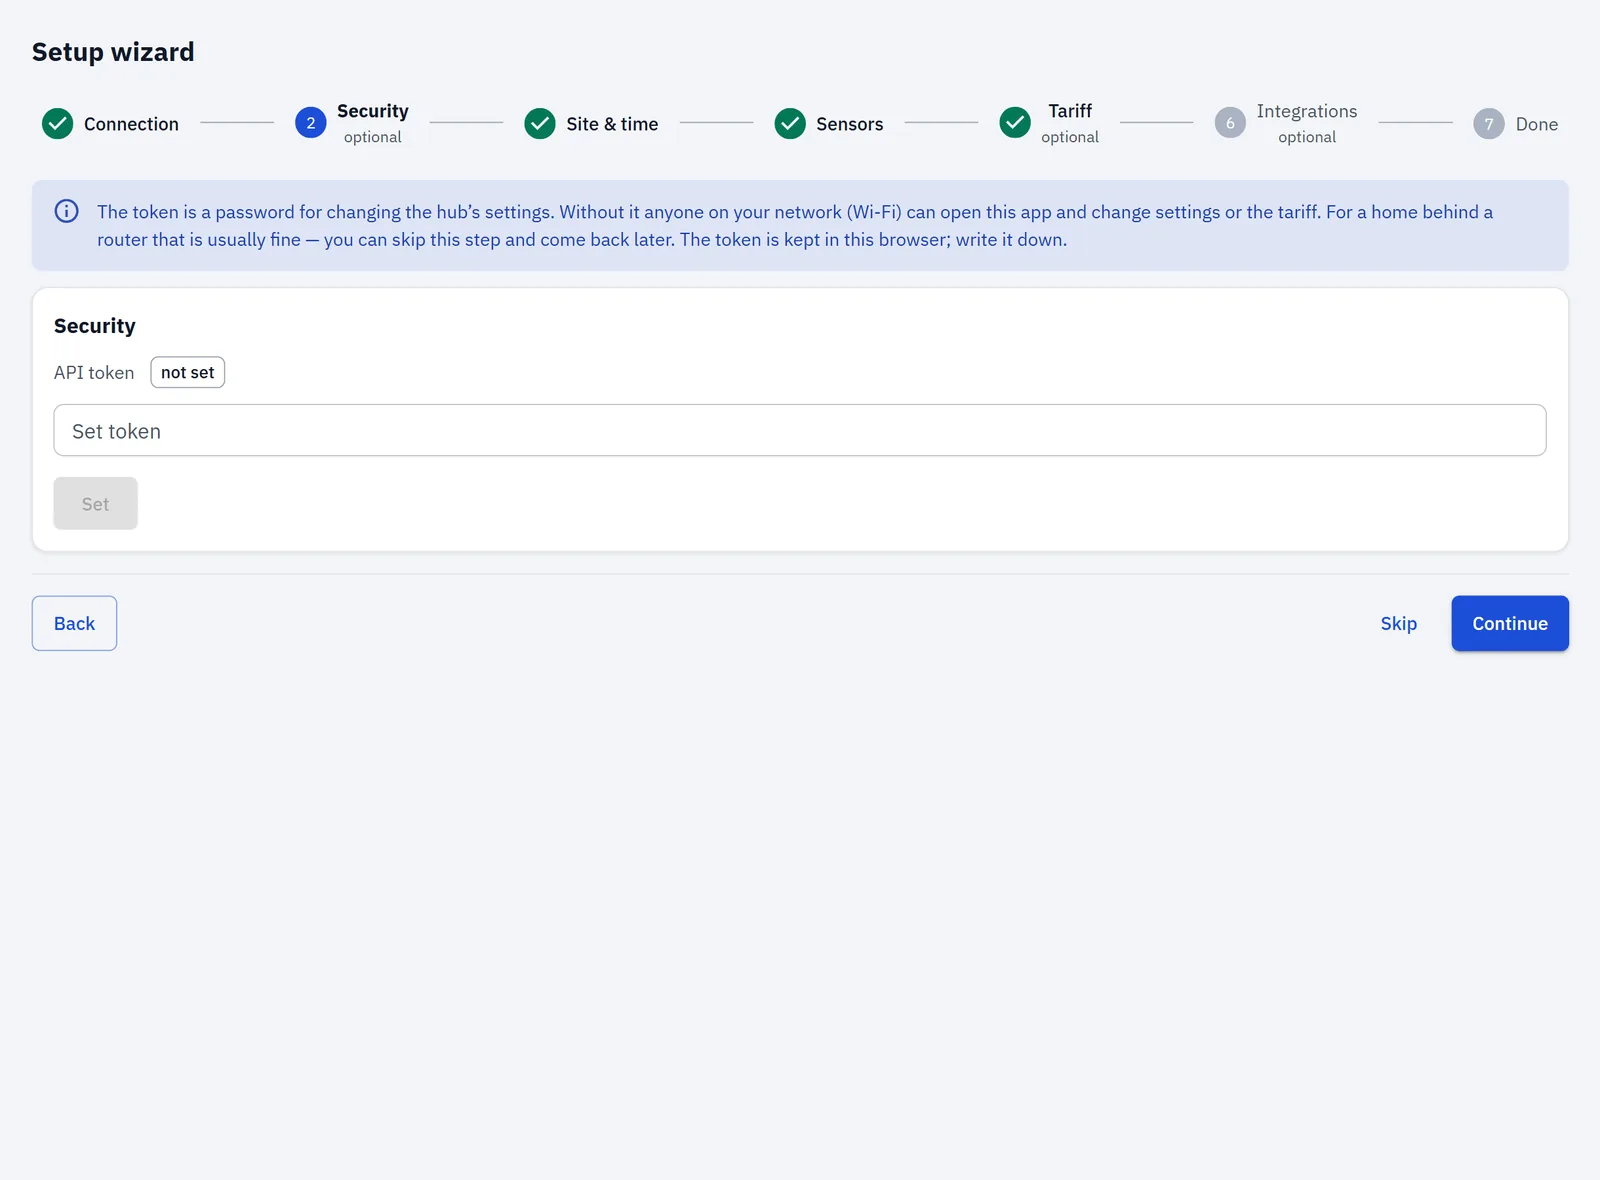
Here you can set the hub's API token. The token is a password for changing the hub's settings. Without it, anyone on your Wi-Fi can open the app and change the settings or the tariff. In a home behind a router that is usually acceptable, so you can skip this step and come back later.
| Field | Default | What to enter |
|---|---|---|
| Set token | empty | A token of your choice: any text. Press Set. |
Once the token is set, every change to the hub needs it. The app keeps the token in this browser. Write it down: you'll need it in any other browser or device.
Later: Settings → Security (see Settings).
3. Site & time
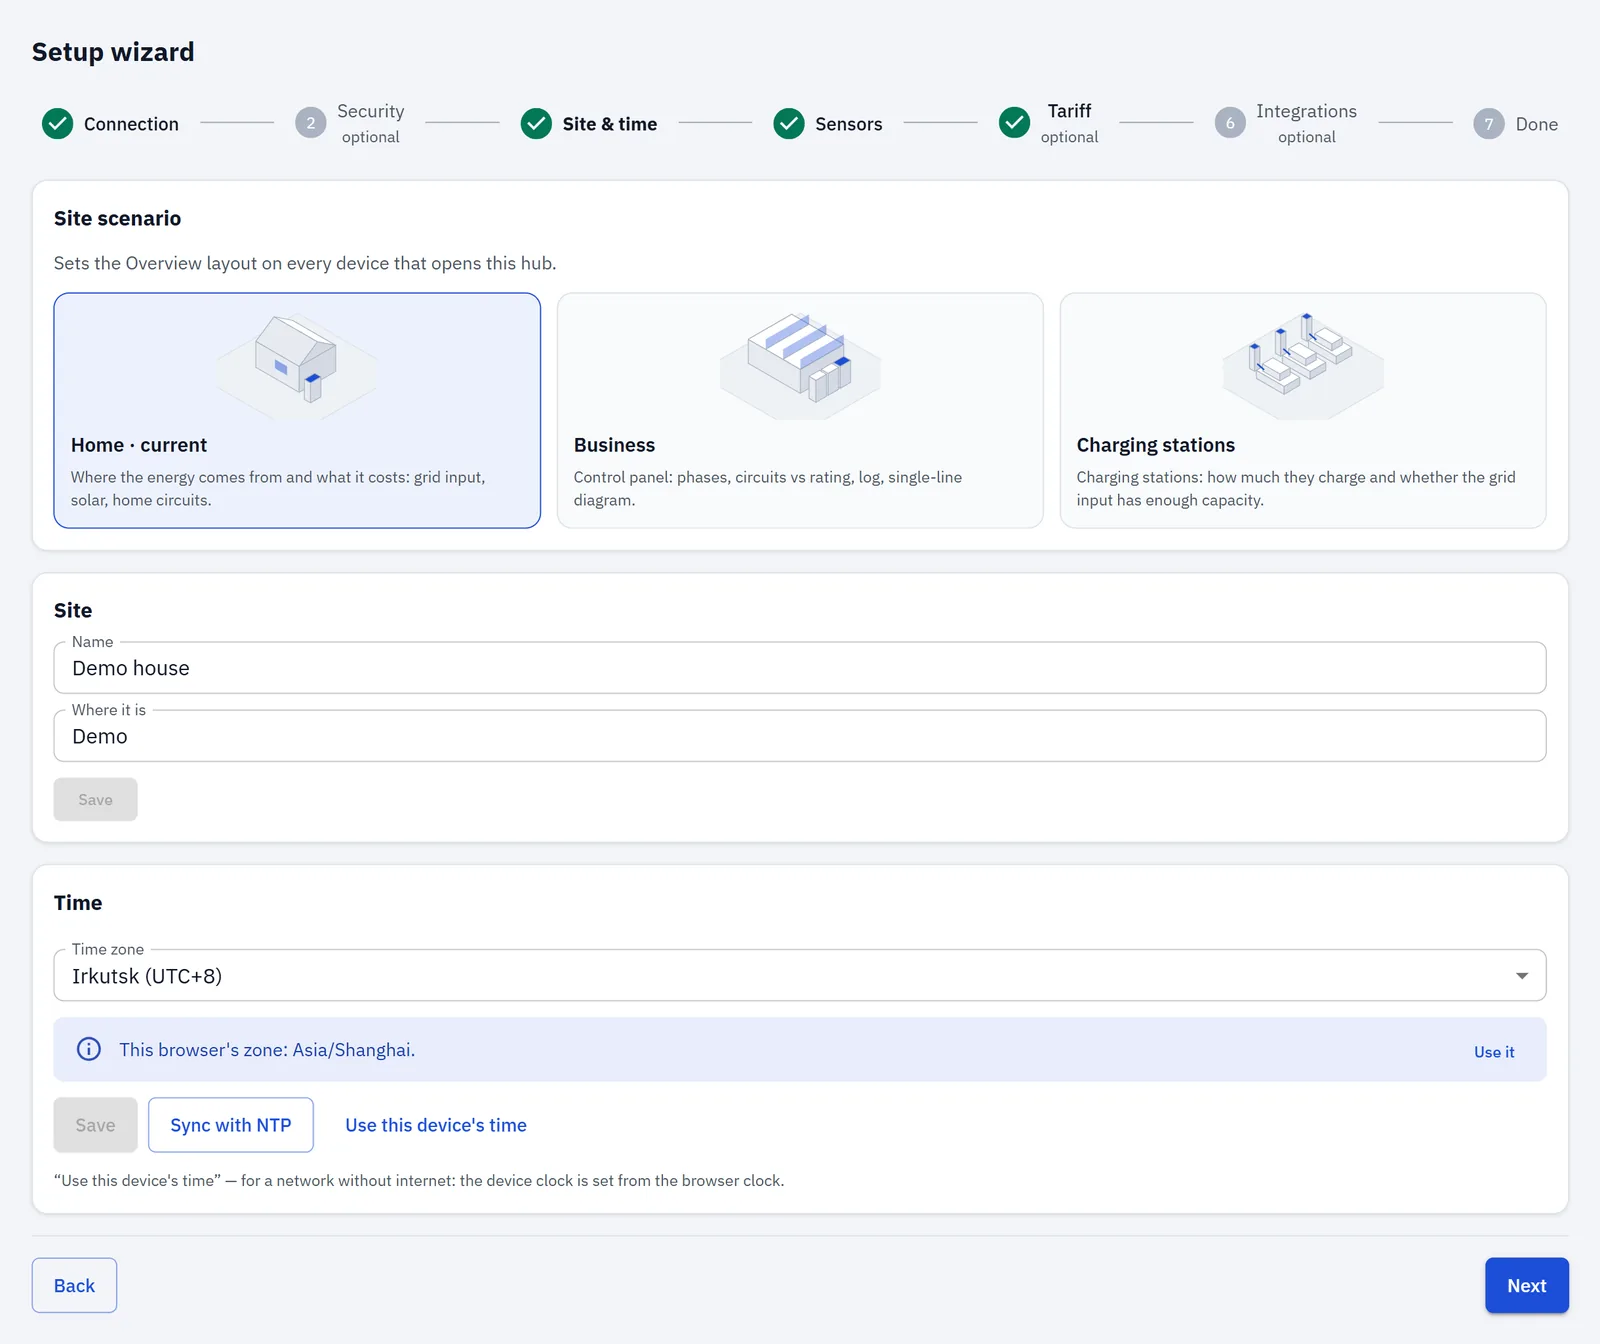
This step has three parts. It counts as finished when the site has a name and the hub's clock is synchronized.
Site scenario
Choose the kind of site: Home, Business or Charging stations. The scenario sets what the Overview shows, for everyone who opens this hub. It applies at once, with no restart. Just preview shows the scenario in this browser only, without saving it. See Settings → Site scenario.
Site
| Field | Default | What to enter |
|---|---|---|
| Name | the hub's current name (empty on a new hub) | The name of the home or building, for example "My home". Up to 31 characters. |
| Where it is | the hub's current location (empty on a new hub) | The town or place, for example "Berlin". Up to 31 characters. |
Press Save. "Saved on the hub ✓" confirms it; "Not saved" means you have an unsaved change. The name and place apply at once.
If you save the name empty, the hub stores "Default", and the wizard treats the site as not yet named.
Time
The hub needs the right time to file each reading under the right hour and day, and to pick the right tariff zone.
| Field | Default | What to choose |
|---|---|---|
| Status | — | Shows synchronized, synchronizing… or not synchronized, and where the time came from. |
| Time zone | the hub's current zone | Your zone from the list, for example "Central Europe — Berlin, Paris, Rome, Madrid, Warsaw (CET/CEST)". If yours isn't listed, choose Other (POSIX TZ) and enter a POSIX TZ string. |
| "This browser's zone: … Use it" | shown when the browser's zone differs | Press Use it to take your browser's zone. |
Press Save. The time zone applies at once. Until you save, the panel reminds you: "The zone isn't saved yet — press "Save"."
Two buttons set the clock:
- Sync with NTP asks the hub to get the time from a time server now. This needs internet access.
- Use this device's time sets the hub's clock from your browser's clock. Use it on a network without internet.
The time servers and the resync interval aren't in the wizard; they're in Settings → Time (see Time).
If a change needs a restart, the panel says "Some settings take effect after a restart." and shows a restart button.
4. Sensors
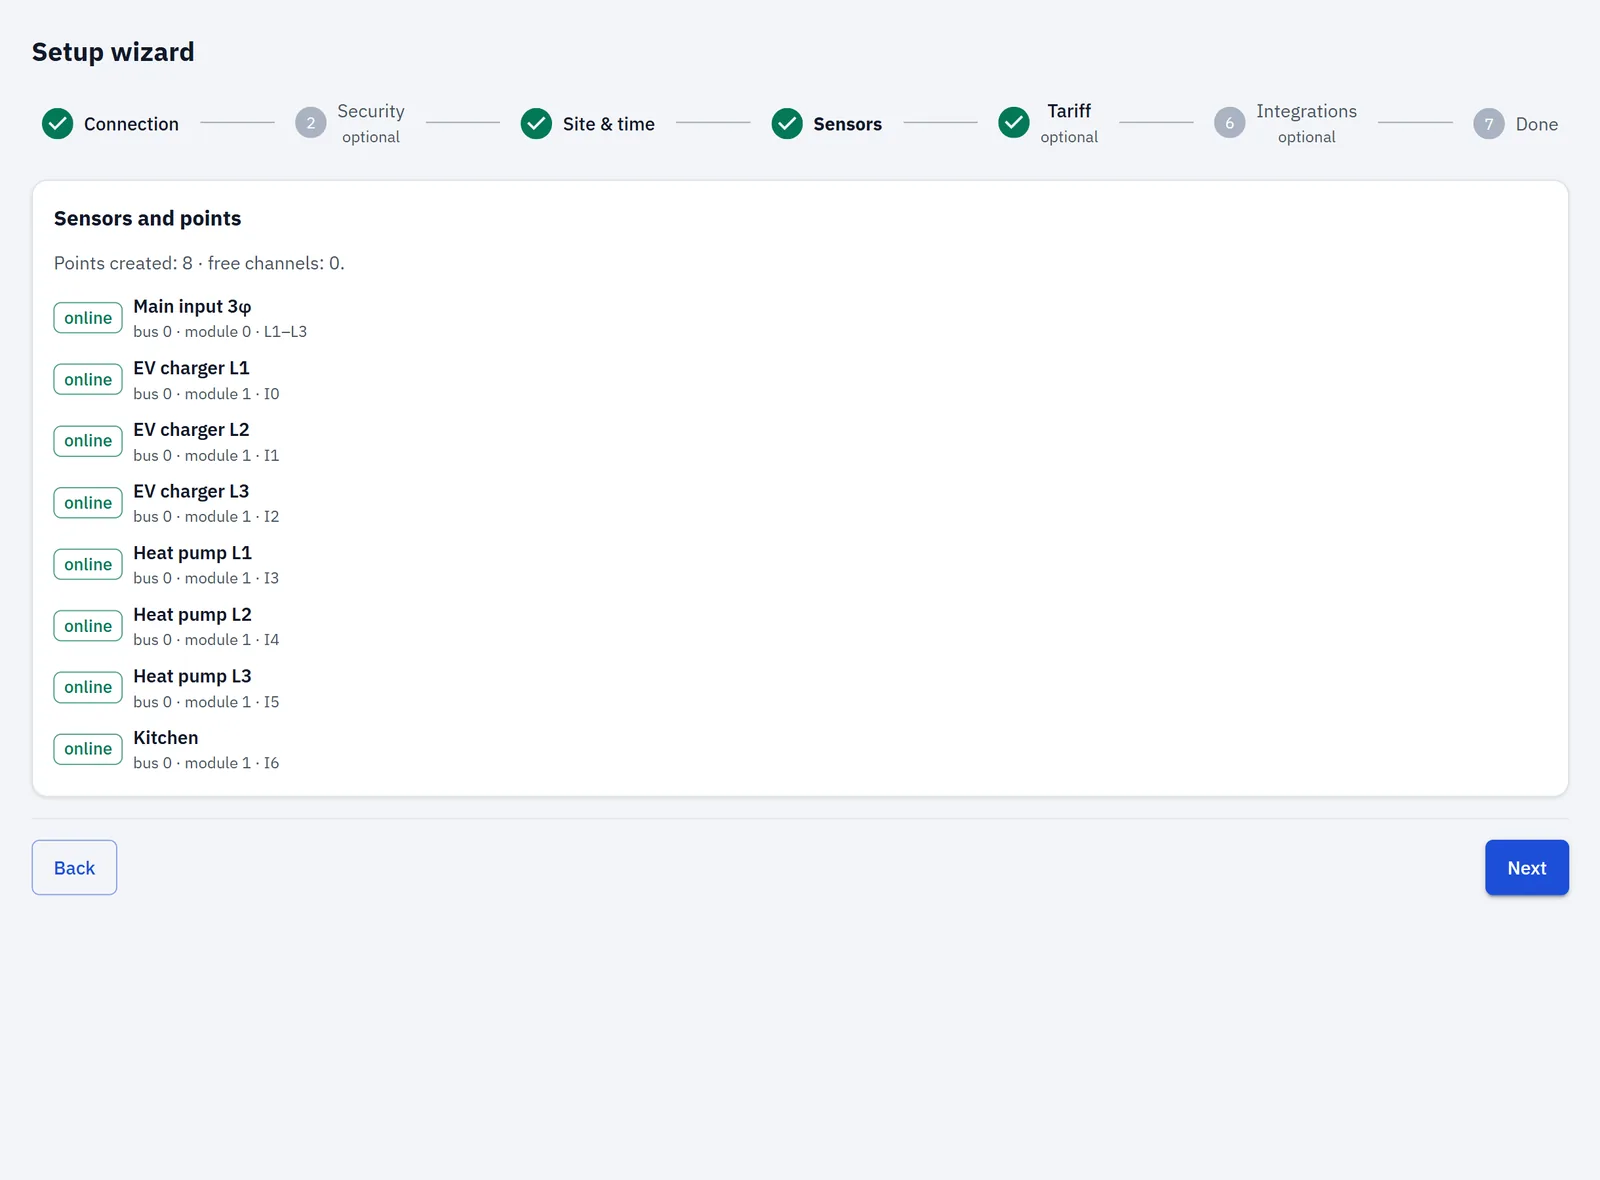
This step lists the current channels of the rbAmp modules the hub found, and turns them into points: named measurement points with a role. It counts as finished when there is at least one point. While the hub starts, the step shows "Hub is starting…".
A new hub already has its grid input: module 0, channel I0. The input role can't be changed from the app, and this step doesn't change it. It only creates points on free channels.
The summary line shows "Points created: … · free channels: …". Each channel shows its state (free, online or no signal), the point's name or "Free channel — no point yet", and where it's wired (bus, module and channel). If no channel shows up, the step says "No sensors detected."
Press Create point on a free channel to open Bind sensor as a point:
| Field | Default | What to enter |
|---|---|---|
| Name | empty | Required, for example "Kitchen" or "Heat pump". Bind stays off until you enter one. |
| Point ID | empty | Optional. Lowercase letters a–z, digits 0–9 and _ . -, up to 32 characters. Leave it empty and the hub makes one from the name. If you removed a point earlier, its ID is offered for reuse (Bind with the previous ID). |
| Role | Appliance | What the point measures: Breaker, Appliance, Load, Generation, Storage, Charging station, Heating/cooling or Smart appliance. Each option has a hint line. Generation and Storage aren't offered on a BASIC module. |
| Phase | not set | The phase the line is on. With no mains system set yet (a new hub): not set, L1, L2, L3 or 3 phases. With a single-phase mains: not set or L1. With a three-phase mains: L1, L2, L3, 3 phases, or L1–L2 (two-pole), L2–L3 (two-pole), L3–L1 (two-pole). If the module's channels form one three-phase point, this field isn't shown. |
| Line rating, kW | empty | Optional. The rating of the line, used for the line load bar. |
| Location (optional) | empty | Where the line or appliance is, for your reference. |
After you bind, the app reminds you: "Home Assistant entities for the new point appear after the hub restarts."
The hub keeps history for up to 12 points. If all 12 history places are taken, a new point shows live values only, and the dialog says so.
Later: the Points page (see Points).
5. Tariff (optional)
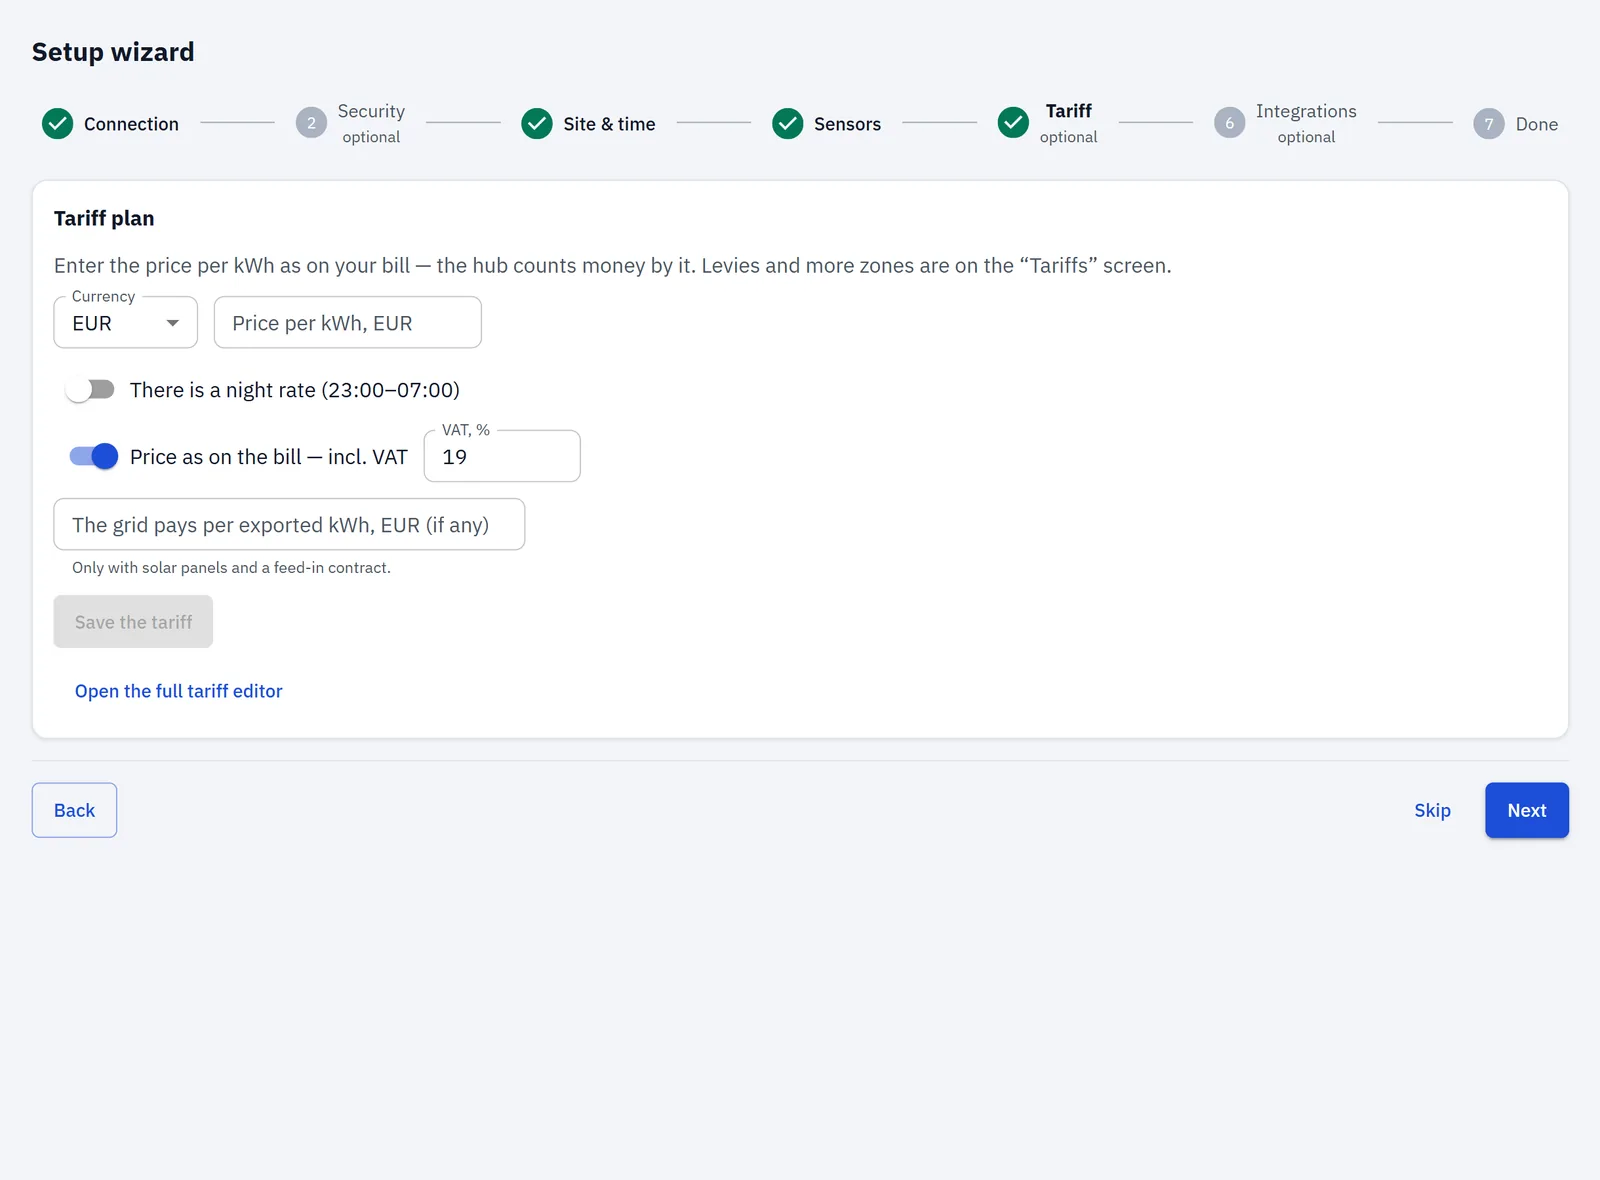
A quick way to give a new hub a simple price plan: one price for the whole day, or a day and a night price. The hub uses it to compute cost per point.
Warning: the quick tariff always replaces the whole tariff plan. Saving here rebuilds the hub's plan from scratch. The energy tax, grid fee and renewable levy are set to 0, fixed charges are cleared, net metering and the progressive tariff are turned off, and the zones are replaced. When the hub's plan is fuller (taxes and levies, net metering, fixed payments or more zones), the app asks first: Replace the hub's tariff? Press Replace to go on. On a new hub with the factory example plan, app v1.1.4 replaces it without asking; app v1.1.3 asks here too. To change an existing plan of your own, edit it on the Tariffs page instead.
| Field | Default | What to enter |
|---|---|---|
| Currency | the plan's currency (EUR on a new hub) | EUR, RUB, USD, GBP, CHF, PLN, CZK, UAH, KZT, JPY or CNY. |
| Price per kWh | empty | The price per kWh as on your bill. Comma or dot both work. Must be above 0. Becomes Day price when the night rate is on. |
| There is a night rate (23:00–07:00) | off | Turn on for a two-zone plan: day 07:00–23:00, night 23:00–07:00. These hours are fixed here; other hours are set on the Tariffs page. |
| Night price (23–7) | empty | Shown when the night rate is on. Must be above 0. |
| Price as on the bill — incl. VAT | on | Leave on if the price you entered includes VAT. The hub then stores the price without VAT and adds VAT back when it computes cost. |
| VAT, % | the plan's VAT (21 % on a new hub, from the factory example) | Your VAT rate. Check it: the field is pre-filled from the hub's plan. |
| The grid pays per exported kWh (if any) | empty | Only with solar panels and a feed-in contract: what you're paid per exported kWh. Otherwise leave it empty: the hub values every exported kWh at this price, even with net metering off, and the Tariffs editor shows sell prices only with net metering on. → Tariffs |
A total line shows the result, for example "Total: day …, night … incl. VAT." and the net price and VAT the hub will store.
Press Save the tariff. It applies at once. Open the full tariff editor takes you to the Tariffs page, for taxes, fees, more zones and other hours.
The step counts as finished once the hub has your own tariff instead of the factory example.
Later: the Tariffs page (see Tariffs).
6. Integrations (optional)
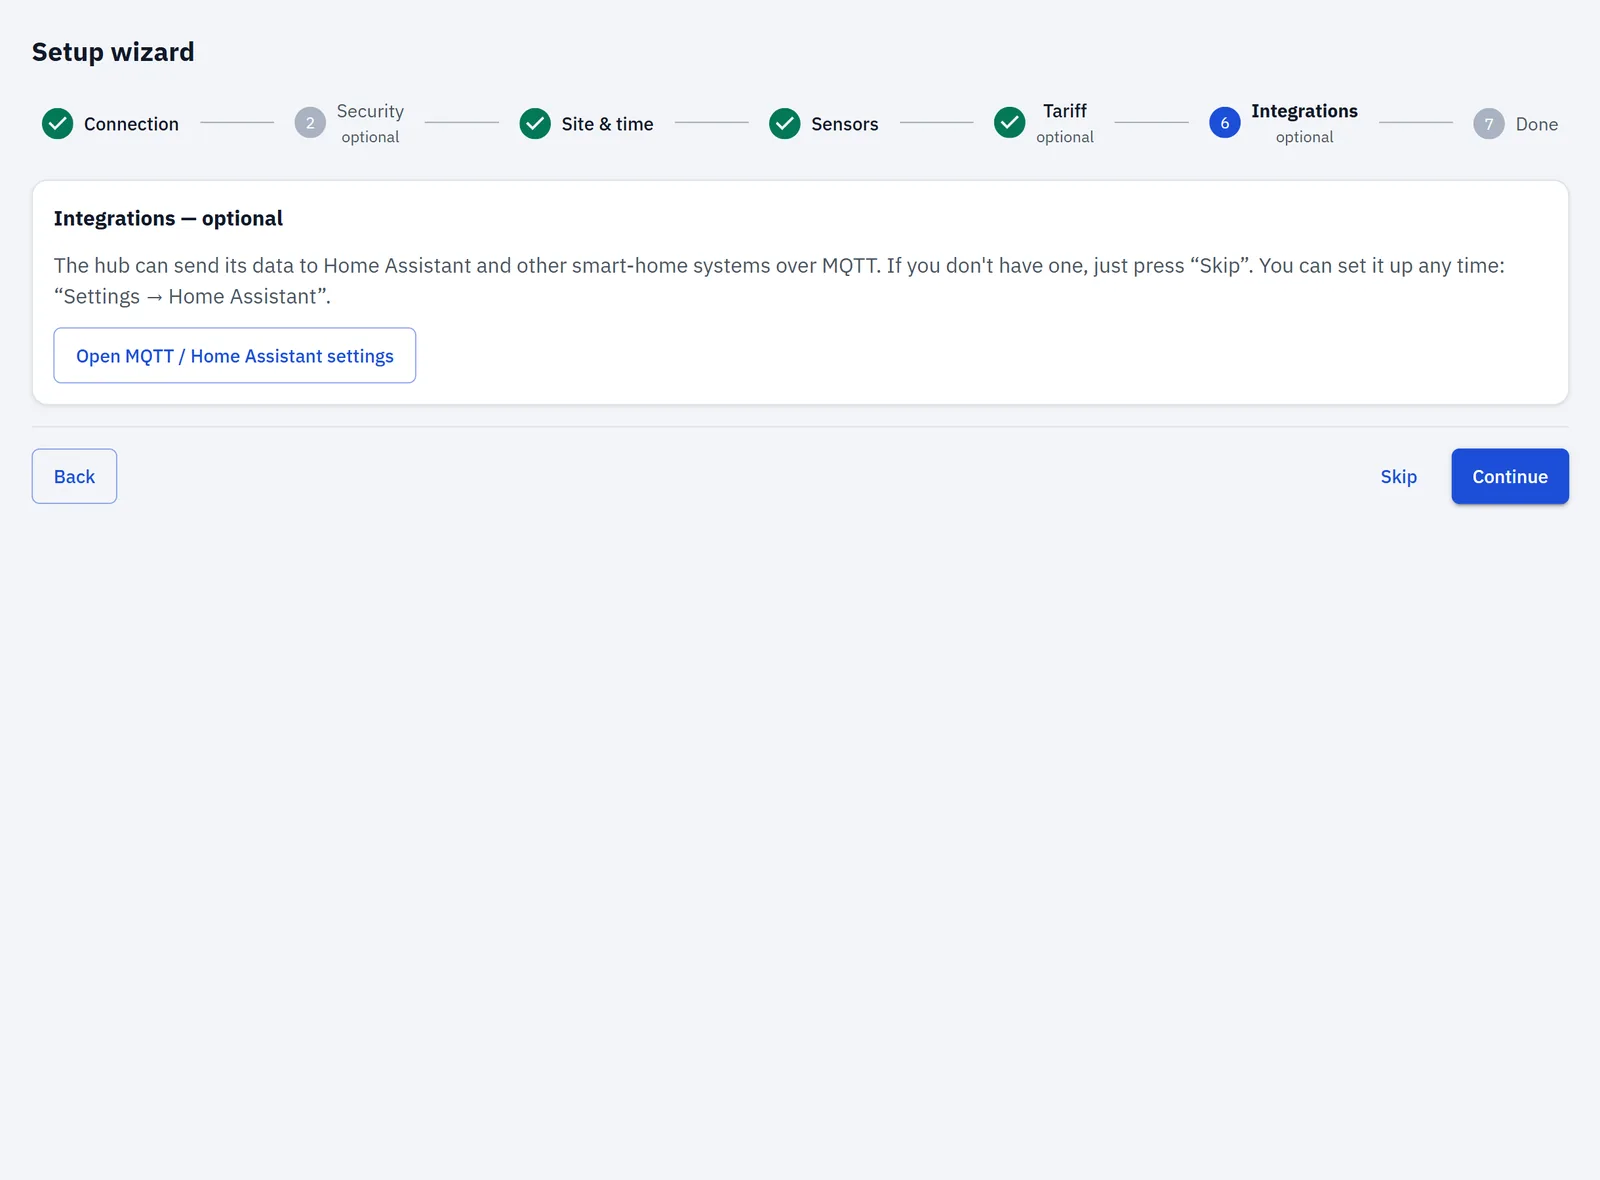
The hub can send its data to Home Assistant and other smart-home systems over MQTT. If you don't use one, press Skip.
Open MQTT / Home Assistant settings opens the Home Assistant panel in Settings, which holds the broker form. There are no fields in this step.
See Settings → Home Assistant and MQTT broker.
7. Done
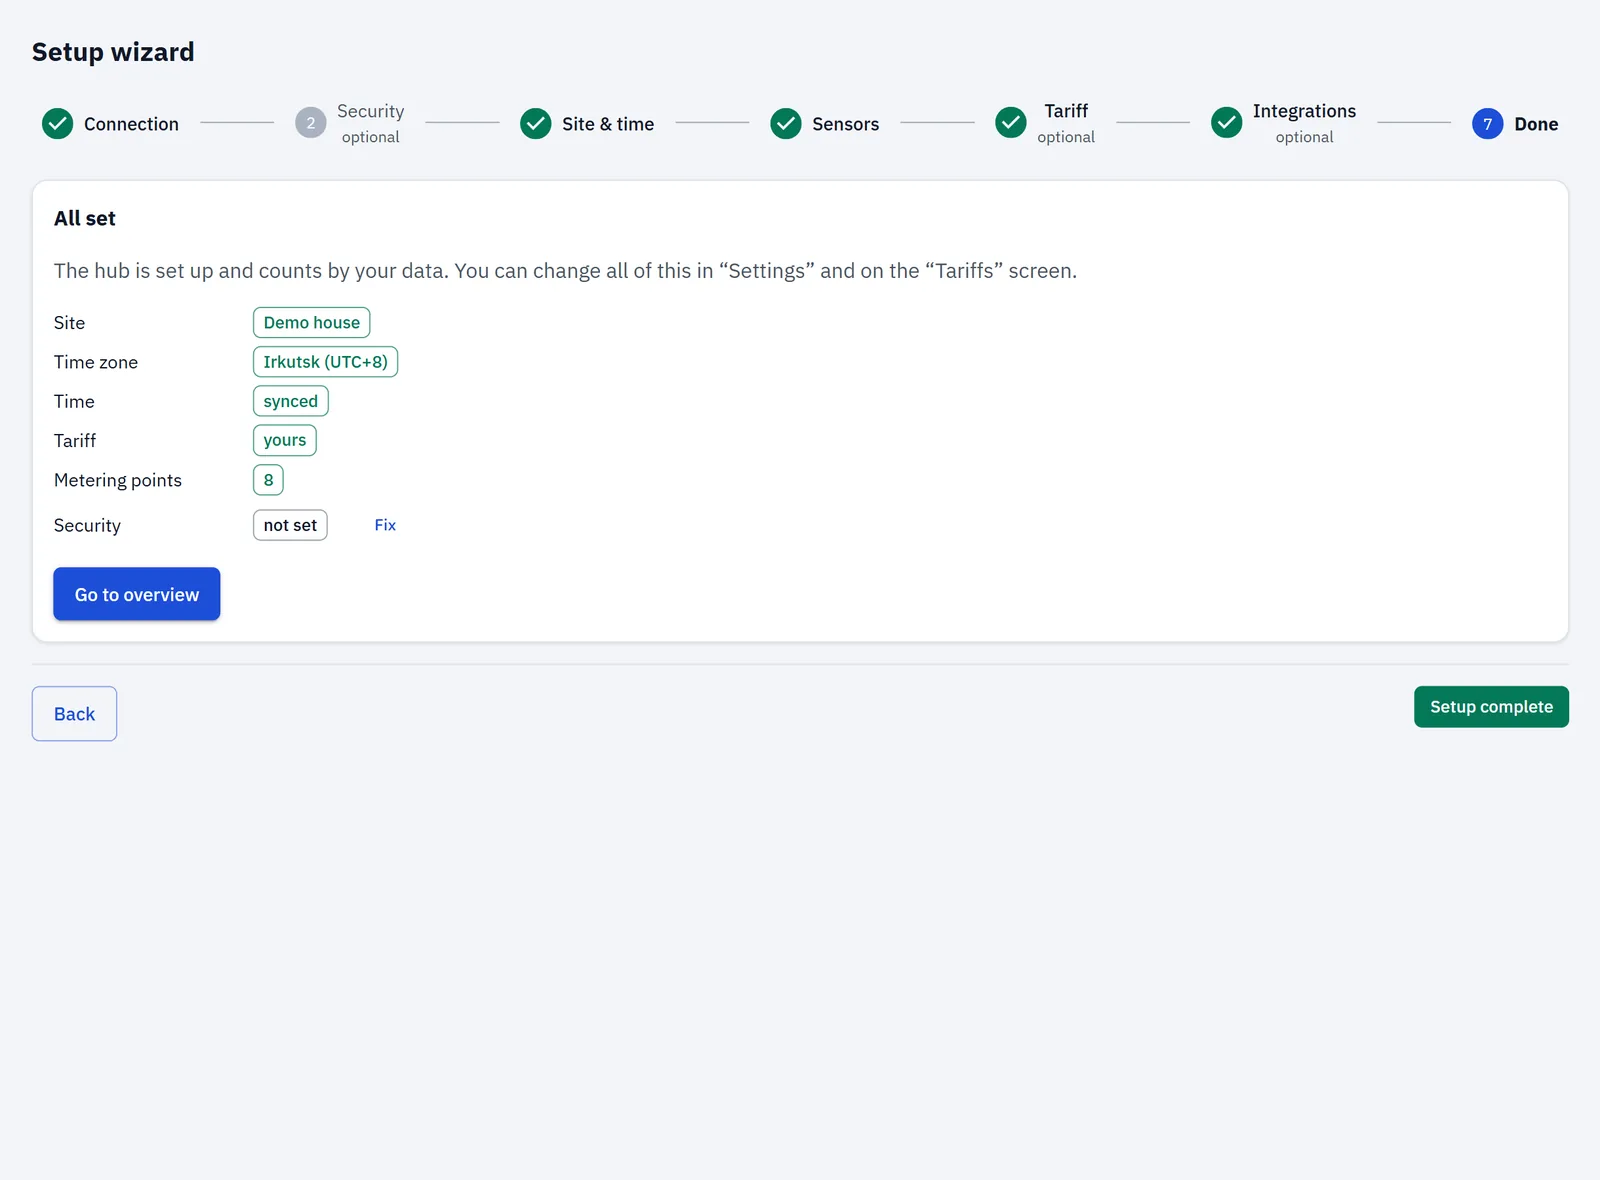
A summary of the setup, with a Fix button next to anything that isn't done yet:
| Row | OK when | Needed for "All set" |
|---|---|---|
| Site | the site has a name | yes |
| Time zone | a zone other than plain UTC is set | no |
| Time | the clock is synchronized | yes |
| Tariff | the plan is yours, not the factory example | yes |
| Metering points | there is at least one point | yes |
| Security | an API token is set | no |
- If a required row isn't done, the title is Almost done with the list of what's left. You can come back to it now, or later from the Setup wizard menu.
- Otherwise the title is All set: "The hub is set up and counts by your data."
Go to overview opens the Overview. It always works, even when some rows aren't done. Everything set in the wizard can be changed later in Settings and on the Tariffs page.
Troubleshooting
The Site & time step stays unfinished
- Check that the site has a name and that you pressed Save.
- Check that the clock shows synchronized. Without internet, use Use this device's time.
The Sensors step shows "No sensors detected."
- Check the module wiring and power, then open the step again.
I already had a full tariff plan and pressed Replace in the quick tariff
- The quick tariff has replaced it. If you saved a restore point before, use Settings → Restore point → Restore and restart. Otherwise enter the taxes, fees and other zones again on the Tariffs page.